How To Give Yourself A DIY Nontoxic Manicure
Regular nail polish, nail polish removers, and other nail care products are typically made with a lot of harmful chemicals. In addition, nail salons are filled with toxic fumes from these products. And then there's the ethical side of nail salons, with allegations of human trafficking. So should this stop you from having a manicure?
Not at all. You don't have to settle for raggedy looking nails and you don't have to do it unethically.
Natural nail care is perfectly possible and a DIY manicure at home is a nice way to pamper yourself.
Set aside some time for an at-home manicure so you can give your nails plenty of time to dry. Make an hour for yourself while you're catching up with your favourite TV show, and you're all set.
Here’s what you’ll need:- Non acetate nail polish remover
- Cotton pads
- Nail clippers
- Emery board
- Orange cuticle stick or cuticle pen
- Clear basecoat
- Non toxic nail polish
- Clear topcoat
- Cotton buds
- Hand lotion
- Nail oil or cuticle oil

Your DIY nontoxic manicure guide
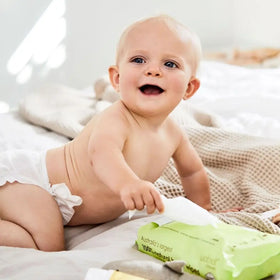
1. The first step in your new natural nail care routine is removing old nail polish. Use an acetone free nail polish remover. Nail polish remover wipes are great for when you’re traveling.
2. After removing your old nail polish, wash your hands to get rid of excess product. Don’t apply hand cream (or foot cream) just yet or the new nail polish won’t stick.
3. Next, clip your nails and file them. I’ve used nail clippers for years as I find that they’re the easiest way to shape your nails, but do make sure they're sharp. Clip your nails into a square shape with rounded corners, which is less prone to cracks and tears.
4. Use a flexible emery board to file your nails. Do this in one direction, not back and forth as this will cause your nails to tear and peel (and that’s not a good look). And never use a metal nail file!
5. Use an orange cuticle stick to gently push your cuticles back. It’s not a good idea to cut your cuticles (unless you've got a hangnail) as they could end up a jagged mess or, worse, get infected.
6. Next, apply a clear basecoat, which will protect your nails from stains and help your manicure last longer. A thin coat is fine.
7. And now the fun part begins! Choose your nail polish colour and apply the first coat. Your natural nail care kit should include at least a 3 free nail polish, which does not contain toluene, formaldehyde, and dibutyl phthalate (DBP) — three of the most toxic ingredients in regular nail polish. Apart from 3 free polish, there’s also 5 free nail polish, which is also without formaldehyde resin and camphor. 7 free nail polish is free from all of the above, plus xylene and TPHP. Hello Charlie has a variety of long wearing and nontoxic nail polish in a wide array of stylish colours. Just do three strokes of colour and don’t worry about streaks at this stage.
8. The second coat is where you don’t want to streak. Use a little more polish on the brush and you’ll get good coverage and colour. Don’t add more polish on top of wet polish! If you have to, you can do a third coat.
9. After 10 minutes, apply a clear topcoat. Wait until the nail polish is nearly dry before you add topcoat or you’ll end up with tinted topcoat in your bottle.
10. Finally, dip a cotton bud in nail polish remover to clean up any mistakes. If you're using nail polish remover wipes, fold one into a triangle and use the pointy end to fix wonky edges.
11. Then you need to give your nails a full 20 minutes to dry. Sit back and catch up on your favourite TV show or read a book.
12. As a final step, when your nails are completely dry, you can pop on lots of nice rich hand cream and nail oil.
Natural nail care tips
- Let your nails breathe from time to time. Just like your hair and your face, your nails also need occasional breaks from products — yes, even from 7 free polish.
- If your nails are stained yellow from too much polish, you can help restore their appearance with a mixture of 1 tbsp baking soda, 1/2 tsp olive oil, and the juice of half a lemon. Use an old toothbrush to scrub your nails with the mixture, let it sit on your nails for a bit, and rinse.
- Let your kids join in on the fun! Hello Charlie stocks non toxic, safe nail polish for kids. You can also get some nail stickers for instant 3D nail art!


